
Setting up a LoRa gateway may seem complicated, but don’t worry. I will first explain the principle, and then show you how to complete the setup of a LoRa gateway.
software and hardware of LoRa gateway
The software and hardware you need to prepare in this article:
I have been playing LoRa modules a lot recently, and even made a LoRa development board myself. Low-power long-range radio communication can be achieved through LoRa technology, which is a small, effective and simple method. You can even unlock more features of LoRa: set up a LoRaWAN network that can be connected to the Internet, allowing mobile nodes to jump between different network management-just like your mobile phone, when you are moving, it will connect to Different signal towers. So this summer I plan to make a low-cost LoRa gateway and run it on the MOKO network. It is much simpler than I thought~
LoRa Gateway hardware
The gateway is a LoRa device connected to the Internet. It can monitor multiple different LoRa channels and forward data packets between the network backhaul (such as MOKO) and the terminal node device. You can think of it as a cellular tower of low-power mobile terminal device nodes.
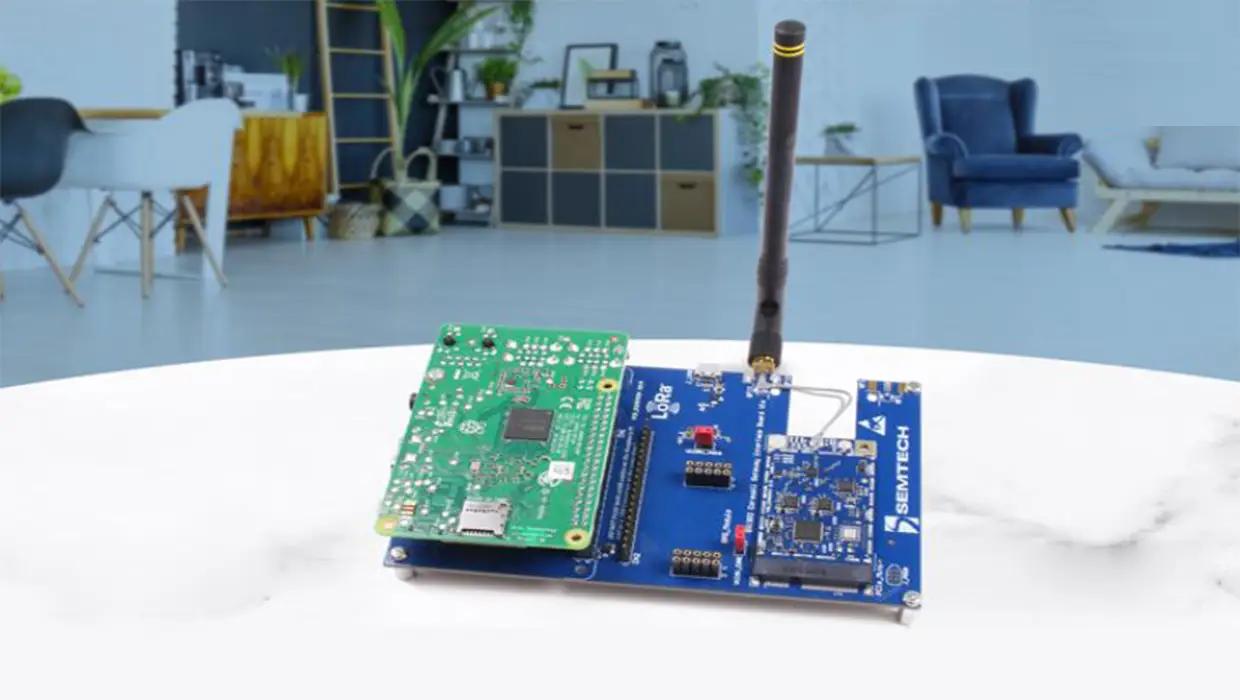
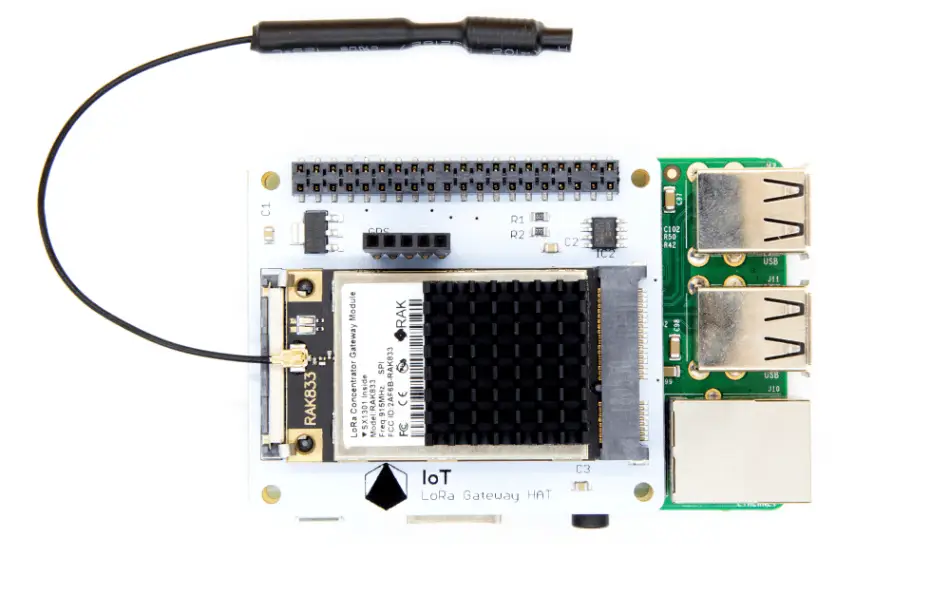
MOKO gave some recommended gateway hardware options, and I chose RAK831 from RAK Wireless for this attempt:
RAK831 is a LoRa concentrator board that can be used with Raspberry Pi. I directly purchased such a LoRa development kit, which contains all the hardware needed in this project:
- – RAK831 LoRaWAN Concentrator Board
- – Raspberry Pi 3B (includes a memory card with built-in MOKO driver and settings)
- – GPS adapter board (connect RAK831 with Raspberry Pi)
- – GPS antenna
- – Glass fiber antenna (60dB gain, used to design high antenna poles)
- – RG-58 connection cable (used to connect the antenna, length 5 meters)
- – Concentrator board radiator
The kit also includes a WisNode board, which is similar to an Arduino+LoRa terminal device; in addition, the kit also includes a LoRa Tracker board, but I don’t need it because I have made a LoRa node with GPU.
Configuration of LoRa Gateway
Because a lot of software has been pre-configured in the memory card, it is relatively simple. These software will be pre installed for the purchase of devices. Basically, these devices can be used directly after purchase. There is no need to find and download the gateway software related to ic880a on GitHub, nor to enable SPI on raspberry pie
I followed the instructions to set the WiFi credentials in /etc/wpa_supplicant/wpa_supplicant.conf.
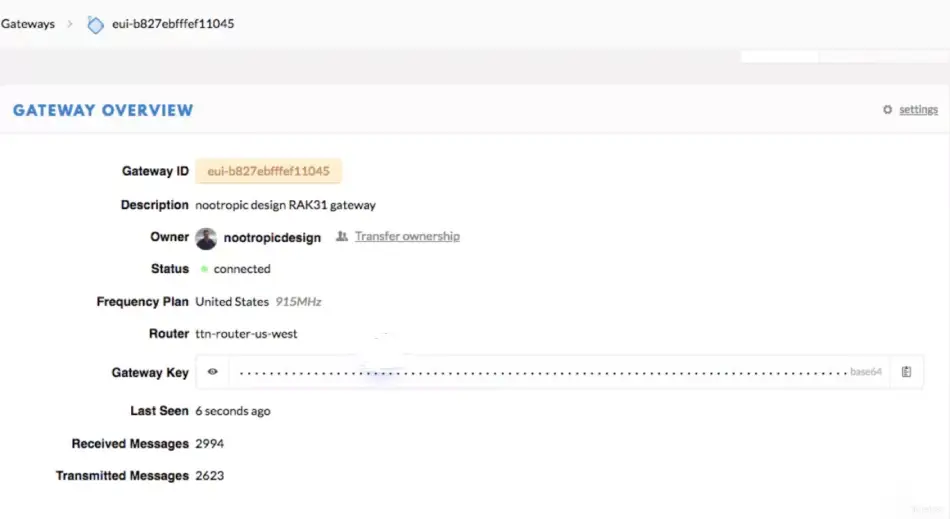
Next, our main work is to find out the meaning of each parameter of the gateway and configure the parameters. First of all, we must confirm the gateway identification, each gateway has its own ID, because this can be accessed through the MAC address of the network interface. The ID of the gateway can be obtained through this script:
GATEWAY_ID=$(ip link show eth0 | awk’/ether/ {print $2}’ | awk -F\:'{print $1$2$3″FFFE”$4$5$6}’); echo ${GATEWAY_ID^^}
The configuration of the gateway is a bit confusing. Firstly, the gateway configuration file is a general configuration file. The general configuration file is suitable for all gateway settings, and then the configuration file settings of specific regions. Because the Lora communication spectrum of different countries may be different, the parameters of the configuration file of all characteristic regions may be different. I live in China, and the configuration files of all Lora gateways I used in the test are China’s global configuration files. GitHub has configuration files for various regions, which is very convenient for developers to download the required configuration files.
The gateway_conf near the end is an important part. This is the correct router information for your area. This file will enter the location of /opt/moko-gateway/bin.
The synchronization clock in GPS is very important to the work of the gateway. The Lora gateway can judge the position of the target object and must rely on GPS to send a synchronization signal. Activating GPS in the file is a very important work. We must configure the gateway in the Lora gateway configuration file_ The following code is added to conf, which is very important for Lora’s work:
{
“gateway_conf”: {
…
“gps”: true,
“gps_tty_path”: “/dev/ttyAMA0”,
“fake_gps”: false,
…
}
}
The specific information of the gateway will be saved in this file /opt/moko-gateway/bin/local_config.json. Here, you can use the key information in global_config.json and your gateway_ID, location information about the gateway location, and contact information.
this is mine:
{
“gateway_conf”: {
“gateway_ID”: “MFP254862KEF1034”,
“ref_latitude”: 22.24851,
“ref_longitude”: 114.06611,
“ref_altitude”: 114,
“contact_email”: “mokofeipeng@mokolora.com”,
“description”: “mokolora design lora gateway lw0003”,
“servers”: [
{
“server_address”: “router.us.mokolora.network”,
“serv_port_up”: 433,
“serv_port_down”:433,
“serv_enabled”: true
}
]
}
}
When the Lora gateway is started, the Lora gateway will call local at the same time_ Config.json information and global_ Configuration information of config.json.
The configuration of Lora gateway can be synchronized with the GitHub file. We can follow the configuration file of the new Lora gateway in real time through the synchronization information of GitHub. The operation is very convenient. The collection path of configuration files of Lora gateway is [gateway remote config GitHub repo] (Moko zh / gateway remote config). Whenever the gateway center starts properly, it will read the message on the GitHub file, judge whether the configuration file is updated, and download the latest configuration file if it is updated. If it can find the relevant file for your gateway, it will delete the local_config.json file and create a symbolic link to clone the file in the warehouse from bin/local_config.json to the Raspberry Pi!
If you want to do this, please disassemble the gateway remote configuration report on GitHub, submit your own local configuration file to the fork report named after your GatewayID (for example, MFP254862KEF1034.json), and then submit the pull to the main repository ask. After a period of time, the request you submit to the warehouse is passed, the local configuration file is merged with the file on GitHub, and the configuration file on GitHub is modified. When the Lora gateway is restarted, the Lora gateway will download the new configuration file, and the new configuration file will take effect.My final configuration is /opt/moko-gateway/bin/local_config.json, which is connected to GitHub [my config file in GitHub](https://www.github.com/moko-zh/gateway-remote-config/ blob/master/MFP254862KEF1034.json) link.
The gateway_conf section in global_config.json only contains the following:
{
“gateway_conf”: {
“gps”: true,
“gps_tty_path”: “/dev/ttyAMA0”,
“fake_gps”: false
}
}
Register Gateway on TTN.
You need to learn [Registration Instructions](https://www..thethingsnetwork.org/docs/gateways/registration.html) to register your gateway on TTN. this is very simple.
Housing and antenna
I installed the gateway in a waterproof case with 5V power supply, LoRa antenna and GPS antenna. The summer weather is not too hot, and I will soon see how this gateway performs in the winter weather in Minnesota. I hope that the heat generated by the Raspberry Pi in the enclosed enclosure can prevent the hardware from freezing, but I don’t know if it will work! (Update: The Raspberry Pi has no problem even at minus 28 degrees Fahrenheit (-33 degrees Celsius)!!!)
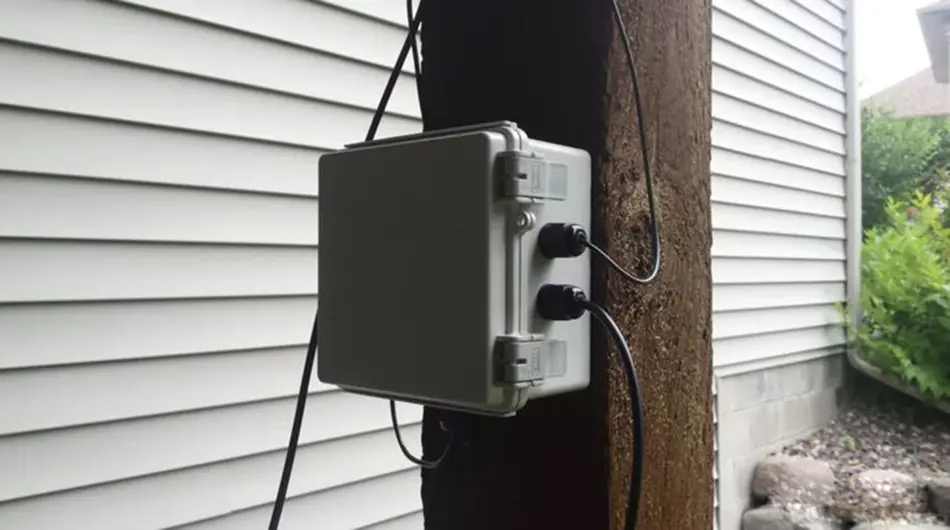
The antenna device is an ordinary plastic tube. I use a long cable concentrator to connect it to the antenna of Lora gateway. The 5-meter cable has power loss, but after taking this into account, the antenna can still provide a net gain. The Lora gateway has been built. It looks great. This process is very interesting and gives me a deeper understanding of Lora.
I hope this gateway setup article is useful to others! LoRa is really an exciting learning technology.